ELECDURA NETWORK

Your Whole New Supply Chain For Heavy-Duty Parts
Whatsapp:
+86 18915027366
Phone:
+86 18915027366
Views: 0 Author: Elecdura Publish Time: 2026-09-04 Origin: Site
A heavy-duty alternator warranty claim should prove three things separately: the returned unit's identity, the charging-system condition in which the complaint occurred, and the physical condition of the alternator and drive after removal. Low battery voltage, repeated jump-starts, noise or a warning lamp does not isolate the alternator. Test battery condition, charging-circuit voltage drop, load and output response, remote-sense wiring where fitted, belt drive and mounting before assigning cause. Preserve the removed unit and failure evidence. A supplier can then distinguish an internal unit fault from cable, battery, load, control, belt or installation problems—and identify what remains unknown.
This evidence chain is for fleets, distributors, workshops and importers. Manufacturer procedures and warranty terms control the final decision; this article does not create a universal warranty entitlement.
Assign one claim number before testing. Record vehicle or equipment model, chassis and engine identity where available, electrical-system voltage, alternator make and complete part number, condition declared at purchase, supplier order, installation date, operating distance or hours, and complaint date. Photograph the installed alternator, label, terminals, pulley, belt and mounting before disassembly.
Build a timeline: battery replacement, jump-start, wiring repair, added electrical loads, belt or tensioner work, engine wash, collision, welding, alternator replacement and first recurrence. Note whether the original complaint existed before the unit was fitted. A return described only as “not charging” leaves the supplier unable to separate a repeated system problem from an internal defect.
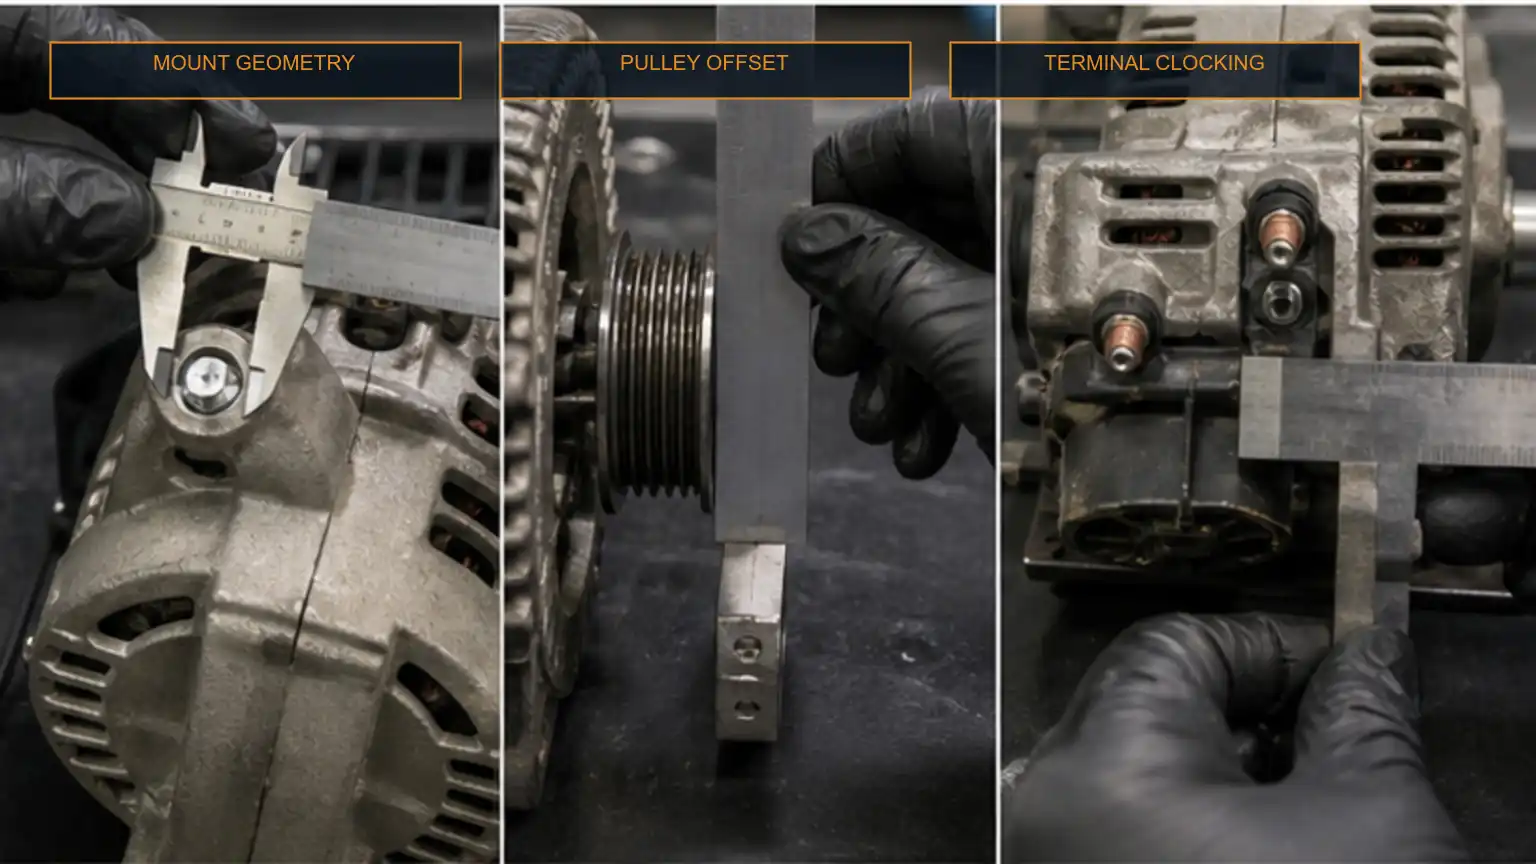
If the part number is unreadable, stop and gather casting, mounting, pulley and terminal evidence without assuming identity. Review the alternator cross-reference fitment audit before a replacement or claim decision. A physically installed unit can still be the wrong electrical or mechanical configuration.
Capture the dashboard warning, fault codes, battery voltage and obvious connection or belt conditions before charging batteries or clearing codes, when safe. Record which batteries are in the bank, their age and state of charge, whether they were disconnected or replaced, and what loads were active. A fully recharged vehicle can behave differently from the original event; the pre-test record protects that context.
Do not run a vehicle with loose high-current connections, damaged rotating parts, heavy smoke, fire risk or battery hazards merely to complete the claim form. Make the system safe and record why a live test was unavailable. Missing data should be marked unavailable, not converted into a pass.
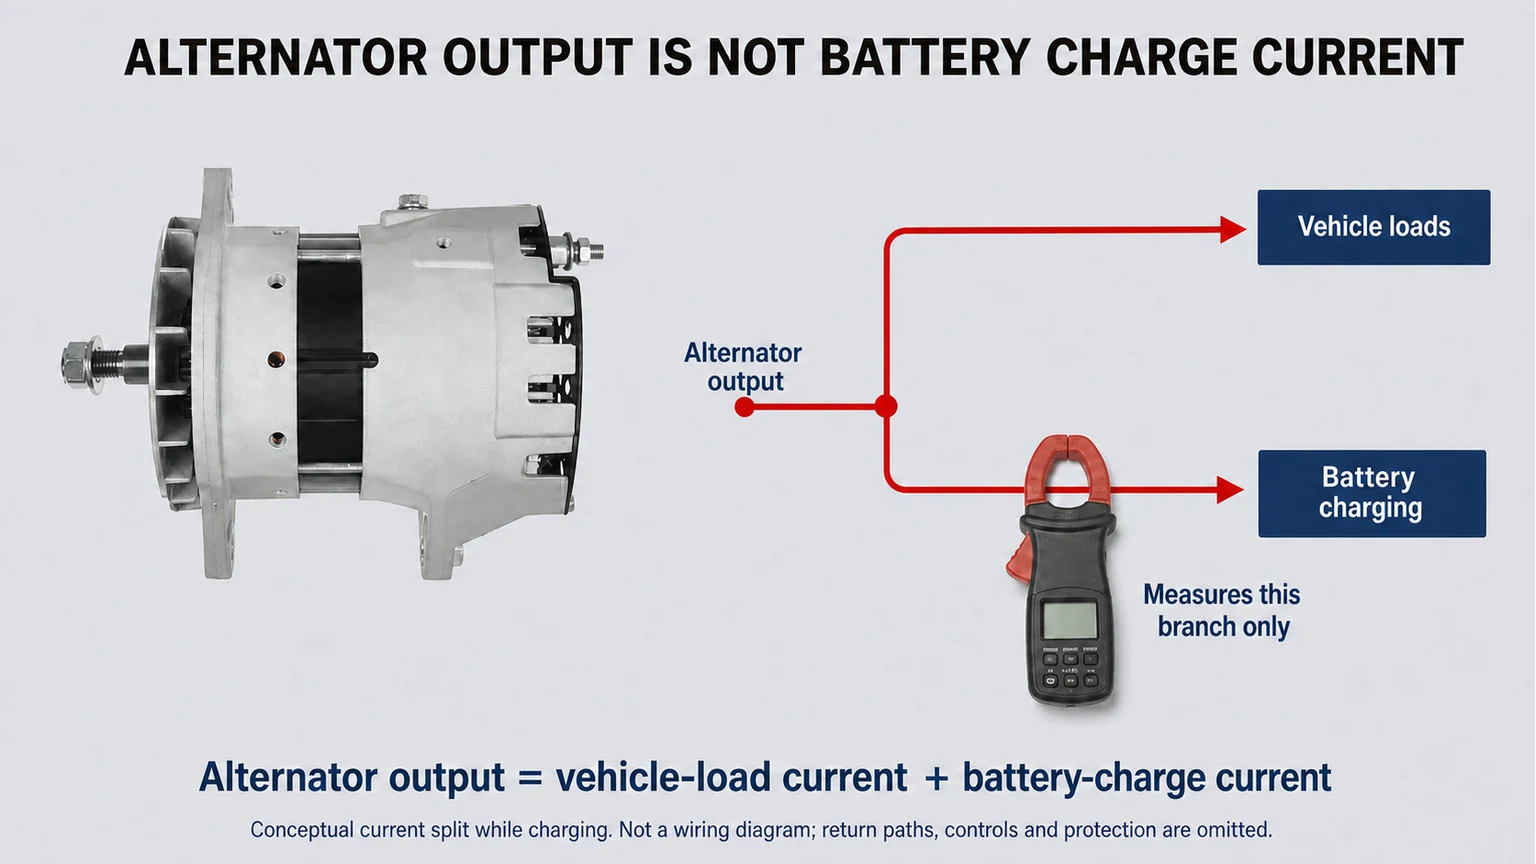
Battery condition, alternator output and circuit loss are related but distinct evidence fields. The illustration provides no universal pass value.
Complaint | Evidence required before unit blame | Possible non-unit cause |
|---|---|---|
Low voltage or discharged batteries | Battery condition, system voltage, loaded alternator output, positive and negative voltage drop, sense circuit and actual load. | Battery failure, cable loss, open fuse, wrong sense connection, excessive load or drive slip. |
High voltage | Voltage at alternator and regulated point, remote-sense routing, grounds, battery connection and model-specific regulator test. | Open sense circuit, poor termination, incorrect regulator application or test-point misunderstanding. |
Noise or vibration | Belt, tensioner, pulley alignment, mount integrity, accessory isolation and removed-unit inspection. | Belt tracking, tensioner, bracket, adjacent accessory or installation stress. |
Intermittent warning | Time-synchronized voltage/current, wiring movement, connector/terminal heat, codes and operating condition. | Loose connection, abrasion, thermal cable resistance or intermittent load. |
Immediate post-install failure | Fitment, polarity, terminal mapping, battery and cable state, belt alignment, output test and installation record. | Wrong application, reversed connection, unsupported load, misalignment or unresolved original fault. |
This classification does not decide liability. It tells the investigator which missing facts would change the decision.
A charging-system test needs batteries capable of participating in the test and connections that can carry current. Follow the battery maker and vehicle procedure for state-of-charge and load testing. Inspect terminals, grounds, disconnects, fuses, cable gauge, crimps and shared junctions. Record instrument identity, connection points, engine speed, load, temperature and readings.
Delco Remy troubleshooting guidance begins at the batteries, then checks charging-circuit voltage drop before alternator output. Its published examples specify system and product limits for those procedures; do not copy them to a different application without confirming the applicable specification. The important warranty principle is the sequence: if cable loss is excessive, repair and retest before interpreting the unit.
Use the heavy-duty alternator voltage-drop guide for the measurement method, and the alternator output-under-load guide for a controlled output record. In the claim file, include the results and source procedure rather than pasting a generic “passed” label.
When the alternator uses remote sense, identify the regulation point and full wire route. Measure voltage at the alternator, battery or junction, and sense termination under the approved operating condition. Inspect the fuse, terminal torque, corrosion, rub-through and repairs. Delco Remy notes that a remote-sense alternator can raise voltage at its output to compensate for cable loss; a higher reading at the alternator is therefore not automatically an overcharging defect.
Do not add jumpers or bypass a sense circuit unless the exact service procedure calls for it. Photograph the original connection before repair. If the vehicle harness was modified, record the modification and treat application compatibility separately from unit condition.
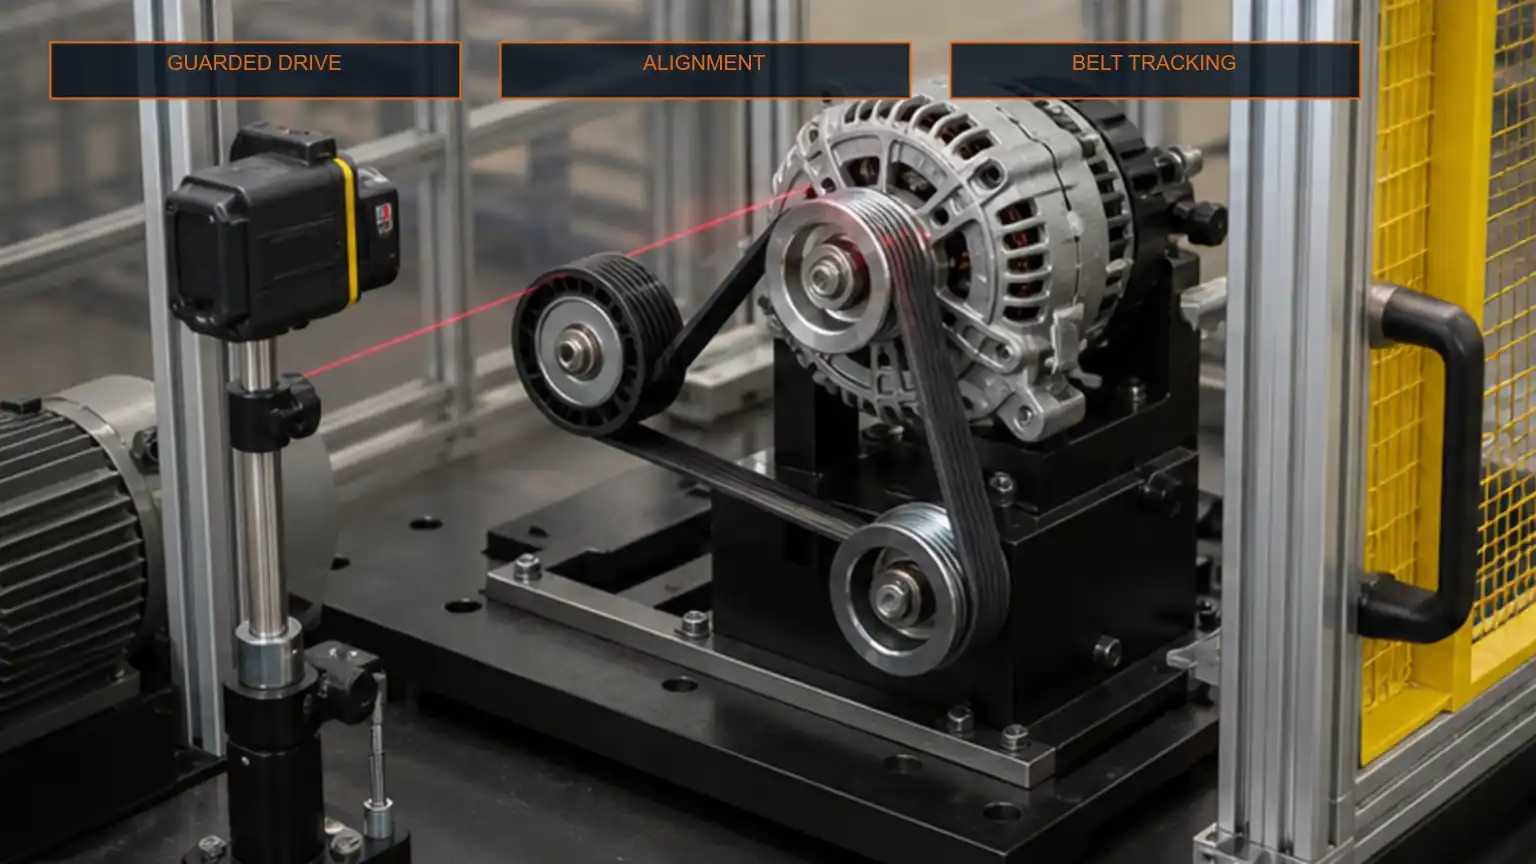
Mark belt direction if it will be reused under the approved procedure, then inspect belt condition, pulley grooves, alignment, tensioner travel, idlers, mount ears, bracket cracks and fastener witness marks. Check for a pulley that was transferred, changed in diameter, incorrectly retained or offset from the belt plane. Note contamination from coolant, oil or cleaning chemicals.
Noise, bearing damage, heat and low output can be consequences of drive slip, excessive belt force or misalignment. A warranty file should show the installed geometry because bench testing the removed alternator cannot reproduce every external mechanical load. If a pulley or fan is missing from the returned unit, identify who removed it and preserve those parts.
Mechanical and electrical interfaces should be photographed in the installed orientation before the unit is separated from its cause environment.
After safe removal, photograph the complete unit, label, terminals, pulley, fan, mount, ventilation openings and any heat, contamination, arcing, impact or fluid evidence. Do not disassemble a warranty unit without written authorization. Opening, cleaning or bench reworking can destroy the supplier's ability to inspect it and may change the contractual claim route.
Cap terminals as required, prevent the pulley from striking the carton, support the unit so the mount cannot crack during transit, and isolate loose hardware in a labeled bag. Include a copy of the claim number without placing adhesive over the product label. If the alternator is wet or contaminated, agree on safe preservation rather than sealing an unknown chemical in unventilated packaging.
A bench result should identify the fixture, wiring, speed, temperature, load, procedure and observed failure. “No output” without battery, field or terminal setup cannot be independently reviewed. If the unit passes a qualified bench test, return to the vehicle evidence instead of declaring the original driver complaint false.
A replacement or repaired system should be commissioned under known load with guarded mechanical observation and electrical records.
Separate fact, interpretation and disposition. Example: “Positive-side voltage drop exceeded the applicable vehicle limit at the complaint load; the cable termination showed heat discoloration; after repair, the original alternator met the applicable output test.” That statement supports a circuit cause. If an internal unit test failed after external conditions passed, state the procedure and result. If key evidence is missing, classify the cause as unresolved and list what is absent.
Do not use “customer misuse,” “factory defect” or “installation error” as substitutes for evidence. The supplier may still apply contractual exclusions, but the technical record should remain reviewable by both sides.
Follow emergency, electrical isolation and battery safety rules first when there is fire, melted wiring, battery venting, rotating-part breakup or another hazard. Follow the specific supplier return authorization when it prohibits local testing or disassembly. For hybrid, high-voltage, liquid-cooled or integrated starter-generator systems, use trained personnel and system-specific procedures; this conventional alternator evidence chain is not sufficient.
No. Battery condition, actual load, cable and ground loss, sense/control circuits and drive condition must be checked. Record alternator output under the applicable test before assigning cause.
Not by itself. The bench may not reproduce heat, vibration, vehicle wiring, belt load or intermittent control conditions. Compare the bench setup with the complaint timeline and vehicle data.
Only with written authorization and a defined evidence process. Unapproved disassembly can destroy causal evidence, create new damage and conflict with the supplier's return terms.
That can be normal when the alternator compensates for cable loss. Measure at the regulated point, inspect the sense path and apply the model-specific specification before labeling the unit as overcharging.
Send identity, order and installation records, complaint timeline, battery/circuit/output/drive evidence, photographs, test procedures and results, removed-unit condition and requested disposition. Keep a copy linked to the same claim number.
When replacement is justified, review the heavy-duty alternator range and send Elecdura the complete identity and claim evidence packet. Include voltage, output requirement, mount, pulley, terminals, remote-sense needs, quantity and destination. A quotation should resolve the original fitment and system question rather than repeat an unverified reference.
Technical references reviewed September 4, 2026: Delco Remy Troubleshooting the Alternator Charging System; Delco Remy Checking Voltage Drops; Delco Remy Troubleshooting Remote Sense-Equipped Alternators; Delco Remy Heavy Duty Troubleshooting Guide. Apply the vehicle, battery and alternator manufacturer's current procedures and warranty terms to the exact system.