ELECDURA NETWORK

Your Whole New Supply Chain For Heavy-Duty Parts
Whatsapp:
+86 18915027366
Phone:
+86 18915027366
Views: 0 Author: Site Editor Publish Time: 2026-08-30 Origin: Site
Direct answer: Rear-head and hose-port evidence can separate heavy-duty A/C compressors that share a similar body, but it must be used with the complete model and installation interfaces. Record pad, manifold, threaded, or other port type; suction and discharge position; rear-head clocking; fitting orientation; seal style; and clearance. Then verify mount, clutch diameter and grooves, pulley offset, voltage, connector, refrigerant, oil specification, and system service information. A hose manifold that appears to bolt on is not sufficient if sealing geometry, port function, or installed routing remains uncertain.
Use the rear head as a visual discriminator, not as a stand-alone part number. Begin with the complete compressor, then classify suction and discharge arrangement, manifold style, sealing face, clocking, connector, clutch, pulley, mount, and installed hose route. The heavy-duty A/C compressor catalogue helps narrow candidates; the measured interfaces and system-fluid requirements decide whether one can actually be fitted.
Visible clue | Photograph or measure | Mismatch consequence |
|---|---|---|
Complete compressor ID | Model and assembly number | Primary catalog path |
Rear head | Port type, function, clocking, seals | Separates similar compressor bodies |
Drive and mount | Clutch, grooves, offset, ears | Proves mechanical installation |
System requirements | Refrigerant, oil, connector, routing | Prevents system contamination or control mismatch |
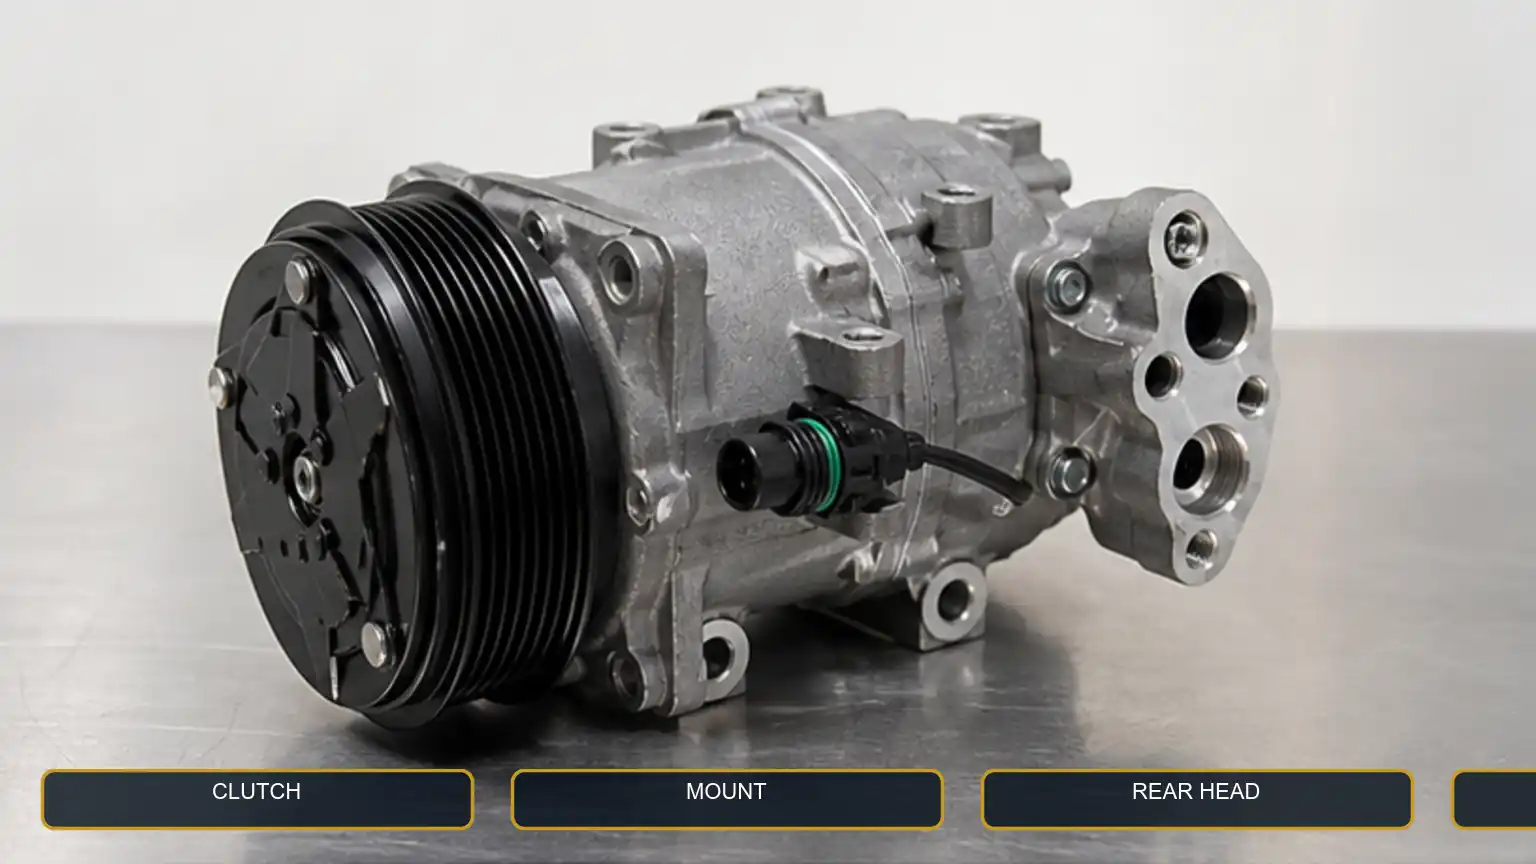
Complete heavy-duty A/C compressor with clutch, mounting ears, rear head, hose ports, and connector visible.
Photograph the model or assembly label, clutch side, rear head, mount, connector, and installed context. Record the host vehicle or equipment, engine, A/C system information, and whether the compressor is believed to be original.
Use the rear head to refine the match, not to replace the complete compressor identity. Similar bodies may be built with different heads, clutches, mounting ears, displacements, or control arrangements. The model path and the observed interfaces must agree.
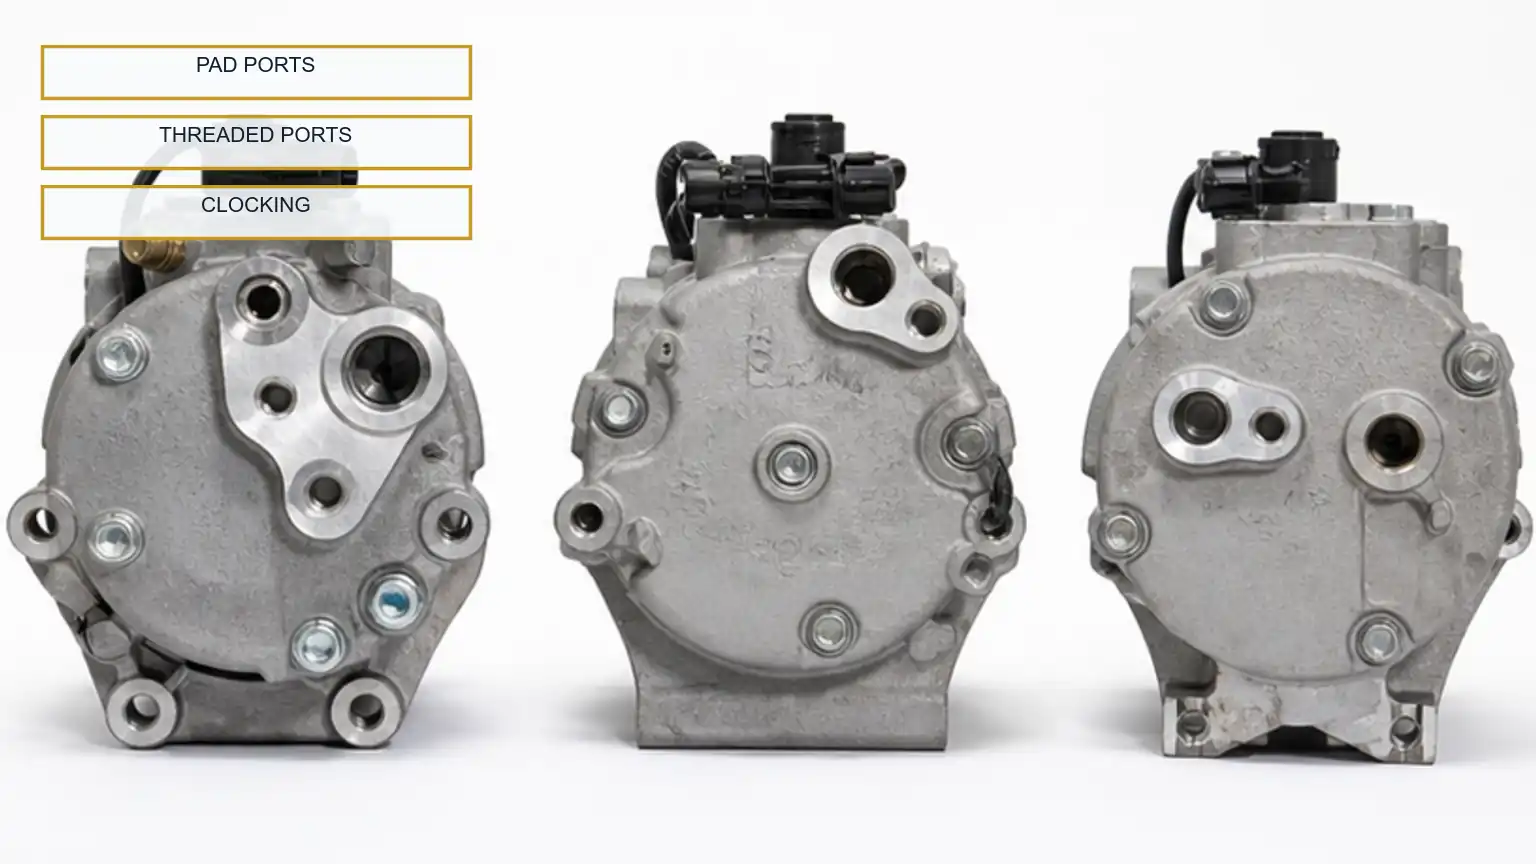
Three heavy-duty A/C compressor rear-head configurations compared by hose-port type and clocking.
Identify whether the hose connection uses a pad, manifold, threaded fitting, flange, or another design. Mark suction and discharge using reliable system information, not only port diameter or position.
Record port center spacing, sealing face, bolt pattern, O-ring or gasket style, fitting angle, service-port relationship, and rear-head clocking relative to the mount. Keep clean protective caps in place until the trial fit. A port-type match must include sealing geometry and function.
Photograph the original hose manifold and its installed path before removal. Check whether the candidate allows the suction and discharge hoses to sit without twist, contact, sharp bend, heat exposure, or interference with the engine, frame, fan, or belt.
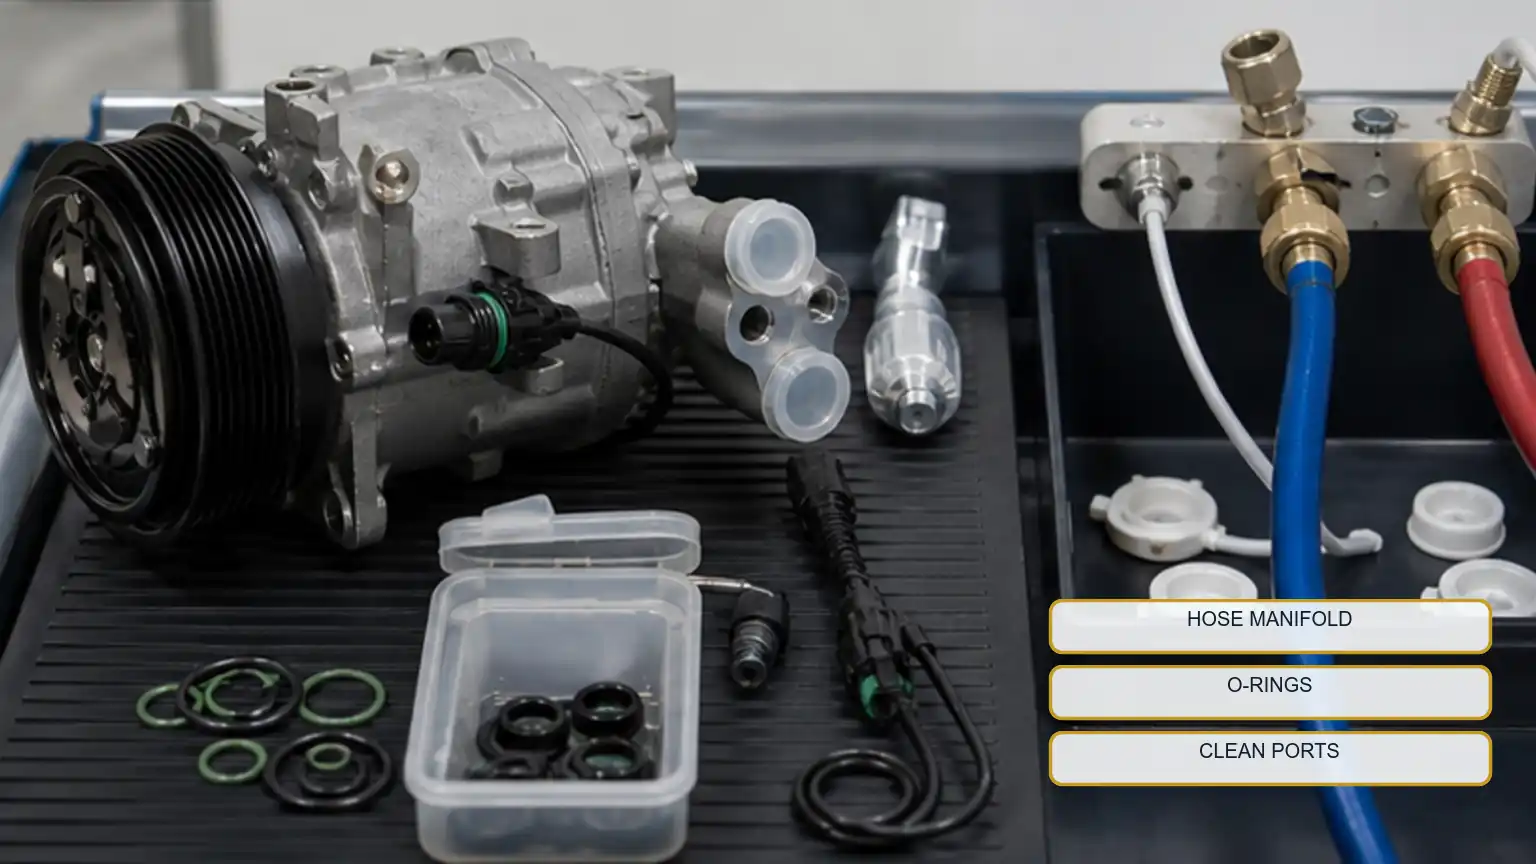
Use a clean controlled trial fit of the approved manifold and seals. Do not force the hose block down with bolts or reuse damaged seals to make the pattern appear compatible. Correct routing and clean sealing are part of fitment, not post-order adjustments.
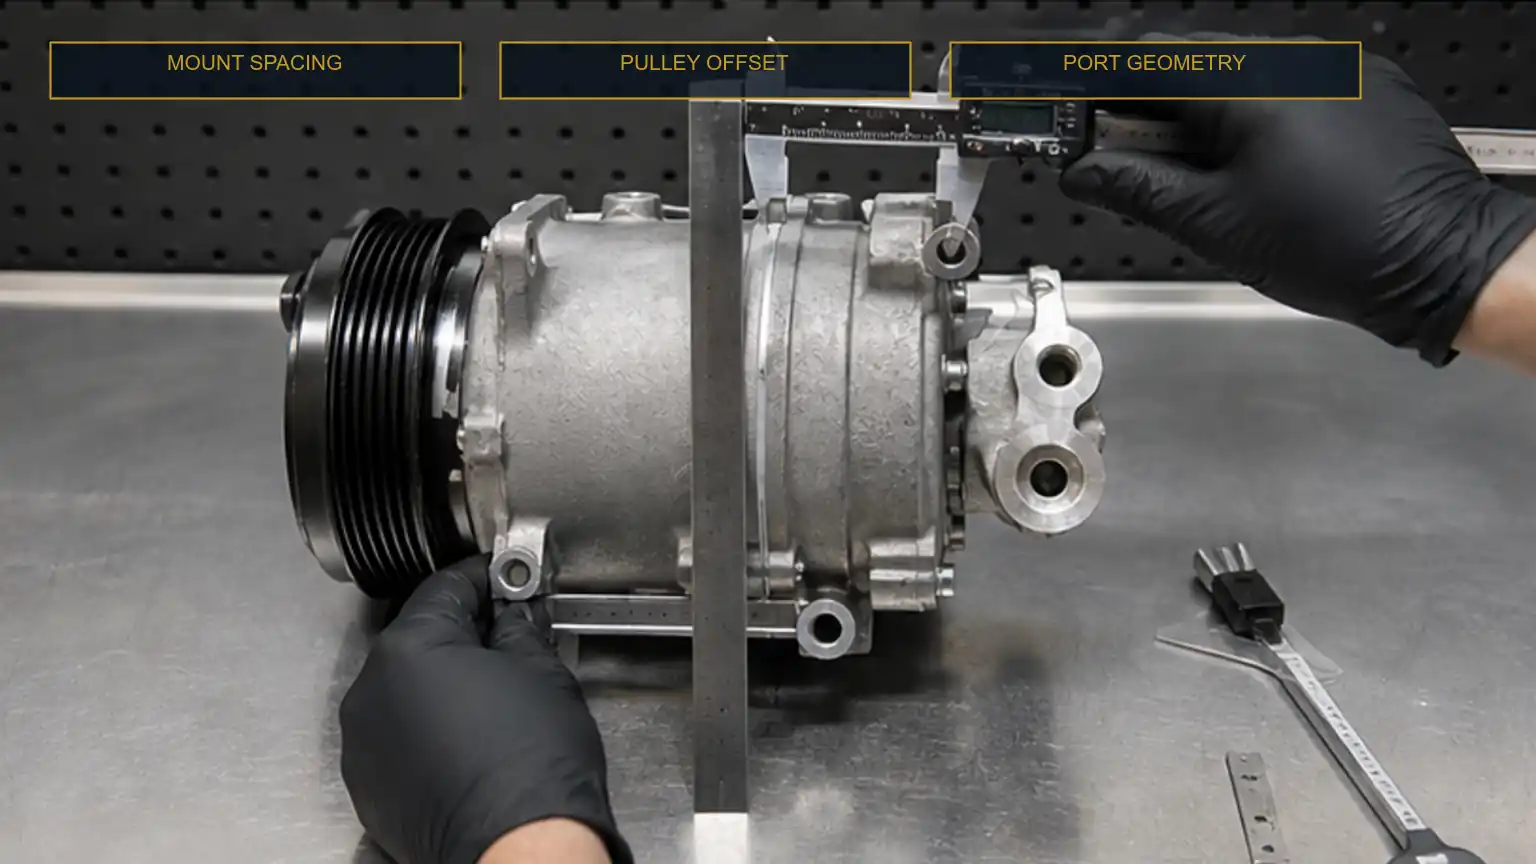
A/C compressor mounting, pulley offset, rear-head geometry, and connector measured on an inspection bench.
Measure mounting-ear positions, span, bolt size, compressor orientation, clutch outside diameter, groove count and profile, pulley offset, and belt plane. Check connector position and coil or control voltage.
A correct rear head can still be paired with the wrong mount or clutch. Compare the complete drive package and ensure belt alignment and service clearance are maintained. Approve the compressor as one assembly, not as a rear-head match alone.
Use current system and compressor information to identify refrigerant, compatible oil type and amount, oil-balancing procedure, flushing or component-replacement requirements, and contamination response. Do not publish or reuse a universal oil amount.
Keep ports capped, inspect for debris or shipping oil instructions, and avoid mixing oils or refrigerants based on visual similarity. A compressor match can still fail when the system service process is wrong. Service-fluid compatibility and cleanliness must be confirmed before the compressor is released.
Compare incoming samples with the approved rear-head, mount, clutch, connector, label, and protection record. Quarantine open ports, damaged sealing faces, mixed heads, unclear model identities, or unexpected changes. Keep installation photographs, vacuum or leak-test results, operating pressures under stated conditions, belt behavior, and claim ownership with the purchase record. Avoid claiming that a workshop check proves every duty condition. The approved identity and clean handling must survive from receiving through installation.
Heavy-duty A/C compressor trial-fit with the approved hose manifold, seals, connector, and protected ports.
If the compressor identity is confirmed but cooling performance remains unresolved, use the A/C compressor diagnosis guide to separate system faults from a replacement decision.
Port position alone does not identify suction and discharge safely.
A hose block that bolts on does not prove sealing geometry or routing clearance.
A matching compressor body does not prove mount, clutch, displacement, refrigerant, or oil compatibility.
Ordering by body shape without rear-head evidence
Forcing hose manifolds to align with bolts
Assuming all similar ports use the same seals
Ignoring pulley offset after the mount appears correct
Use the vehicle, equipment, and compressor maker's service information for refrigerant handling, oil balancing, flushing, evacuation, charging, and safety. This guide supports identification and procurement; it is not a universal A/C service procedure.
Complete compressor model and all-side photographs
Rear-head port type, function, spacing, clocking, and seals
Original hose manifold and routing
Mounting ears, clutch, grooves, pulley offset, and voltage
Connector and control arrangement
Refrigerant, oil, and cleanliness requirements
Trial fit, incoming inspection, and installation evidence
Send Elecdura the compressor label, rear-head and hose-manifold photographs, port measurements, mount and clutch details, refrigerant and oil requirements, quantity, and destination. The RFQ can then distinguish complete assemblies that share a similar body. Continue through the A/C compressor matching RFQ with the evidence named in this guide.
No. The rear head can narrow candidates by port type, suction and discharge arrangement, manifold pattern, sealing geometry, and clocking, but it does not establish the complete compressor. Confirm the model or assembly identity, mount, clutch diameter and grooves, pulley offset, connector and voltage, refrigerant and oil requirements, displacement or control type where applicable, and installed clearance. Approve the unit only when rear-head evidence and the rest of the assembly agree.
Use the compressor maker's service information, a reliable system diagram, port markings, or a trace of the installed hoses. Do not decide only from port diameter, position, or a photograph of a similar compressor. Record the port function, center spacing, sealing face, bolt pattern, fitting orientation, and hose route. Reversing or misidentifying the ports can invalidate the match even when the manifold appears to bolt onto the rear head.
Follow the applicable compressor and vehicle service procedure. For identification work, use the correct clean seal geometry and never rely on a flattened, cut, swollen, contaminated, or improvised seal to make a manifold appear compatible. Do not force the block down with bolts. The trial fit should establish bolt pattern, port alignment, sealing land, and hose routing without damaging the candidate or introducing contamination; final installation requires the specified service seals and procedure.
Clocking determines where the suction and discharge connections sit relative to the mount, clutch, connector, engine, frame, fan, and hoses. Two compressors may share a body and port style but route the manifold differently, creating twist, interference, heat exposure, or service-access problems. Photograph the rear head square to a defined compressor reference and record the fitting orientation. A correct port type with the wrong clocking is still a fitment mismatch.
Begin with carton and complete-assembly identity, then verify capped clean ports, undamaged sealing faces, rear-head configuration and clocking, mount, clutch and pulley, connector, and shipping protection. Compare the sample with the approved record before removing caps or introducing seals. Quarantine open ports, debris, corrosion, impact damage, mixed identities, or unexpected component changes. Receiving should preserve cleanliness and evidence; it should not become an uncontrolled installation test.