Your Whole New Supply Chain For Heavy-Duty Parts
Whatsapp:
+86 18915027366
Phone:
+86 18915027366
Views: 0 Author: Site Editor Publish Time: 2026-09-01 Origin: Site
A replacement turbocharger is ready for first start only when five records agree: the previous failure cause has been addressed, the new assembly identity and supply scope are correct, the air and exhaust paths are clean and connected, the oil feed and drain paths meet the engine-specific requirements, and the prescribed pre-lubrication has been completed. Priming the center housing is important, but it cannot compensate for a blocked feed, restricted drain, contaminated engine oil, excessive crankcase pressure or the wrong turbo. Release the installation only after the first-start inspection confirms oil, air and exhaust integrity under the specified procedure.
This guide is for workshops and distributors documenting a heavy-duty turbocharger installation. It does not replace the engine or turbo manufacturer's instructions, torque values or acceptance limits.
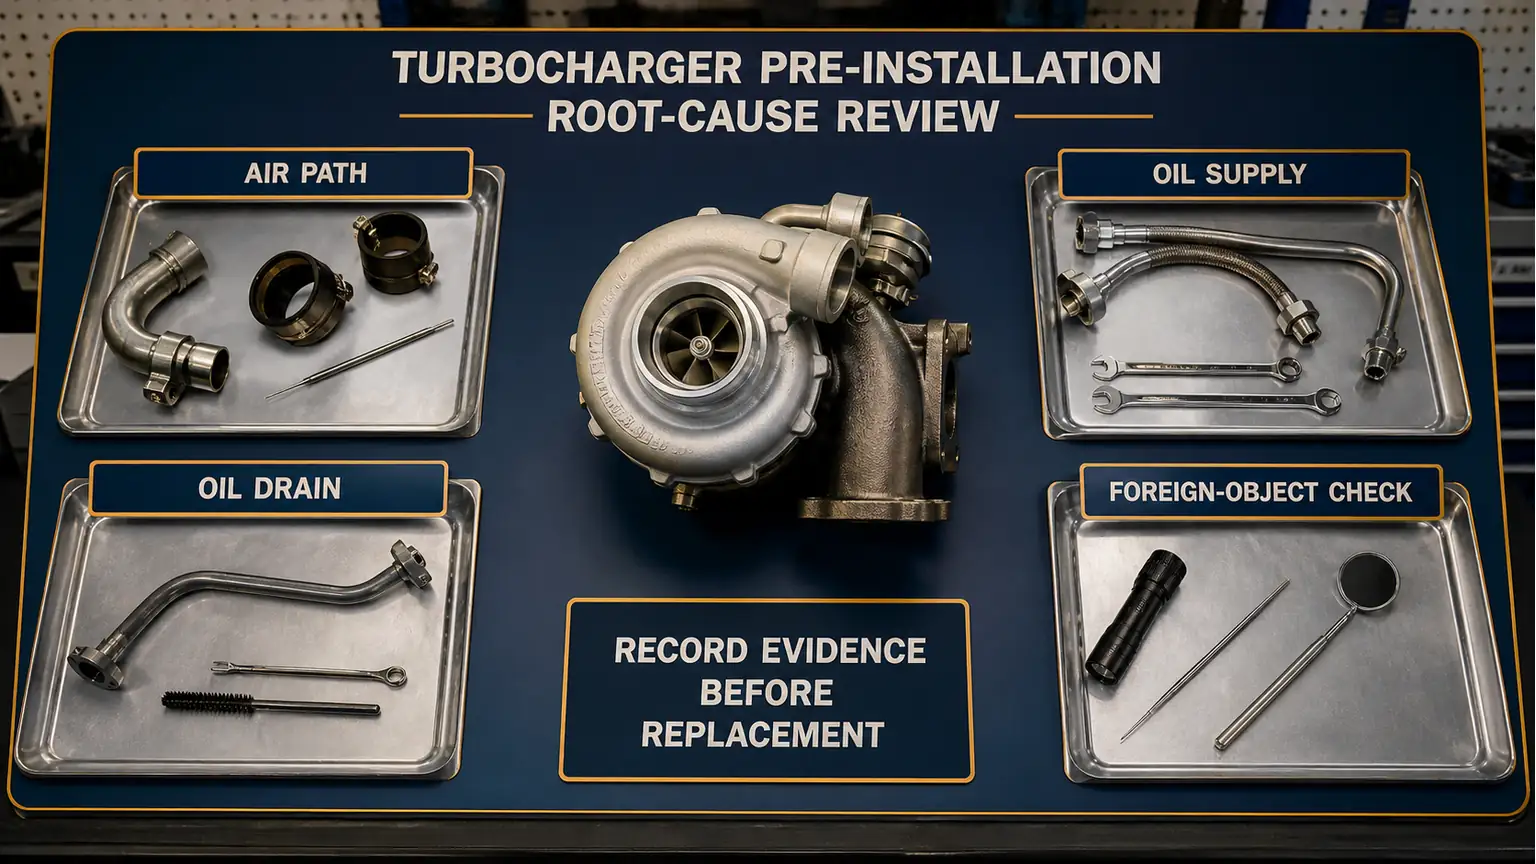
Before discarding, cleaning or returning the old assembly, document its complete identification, orientation, actuator and connections. Record the complaint and inspect the failure evidence the applicable procedure calls for: foreign-object damage, oil starvation, contamination, overspeed or temperature evidence, air-path leaks, exhaust restrictions, crankcase pressure and lubrication-system conditions. A damaged turbo is often the victim of another system fault.
State how each confirmed cause was corrected. “New turbo installed” is not a root-cause action. If the cause remains unknown, the release stays open and the risk must be escalated rather than hidden in a general checklist.
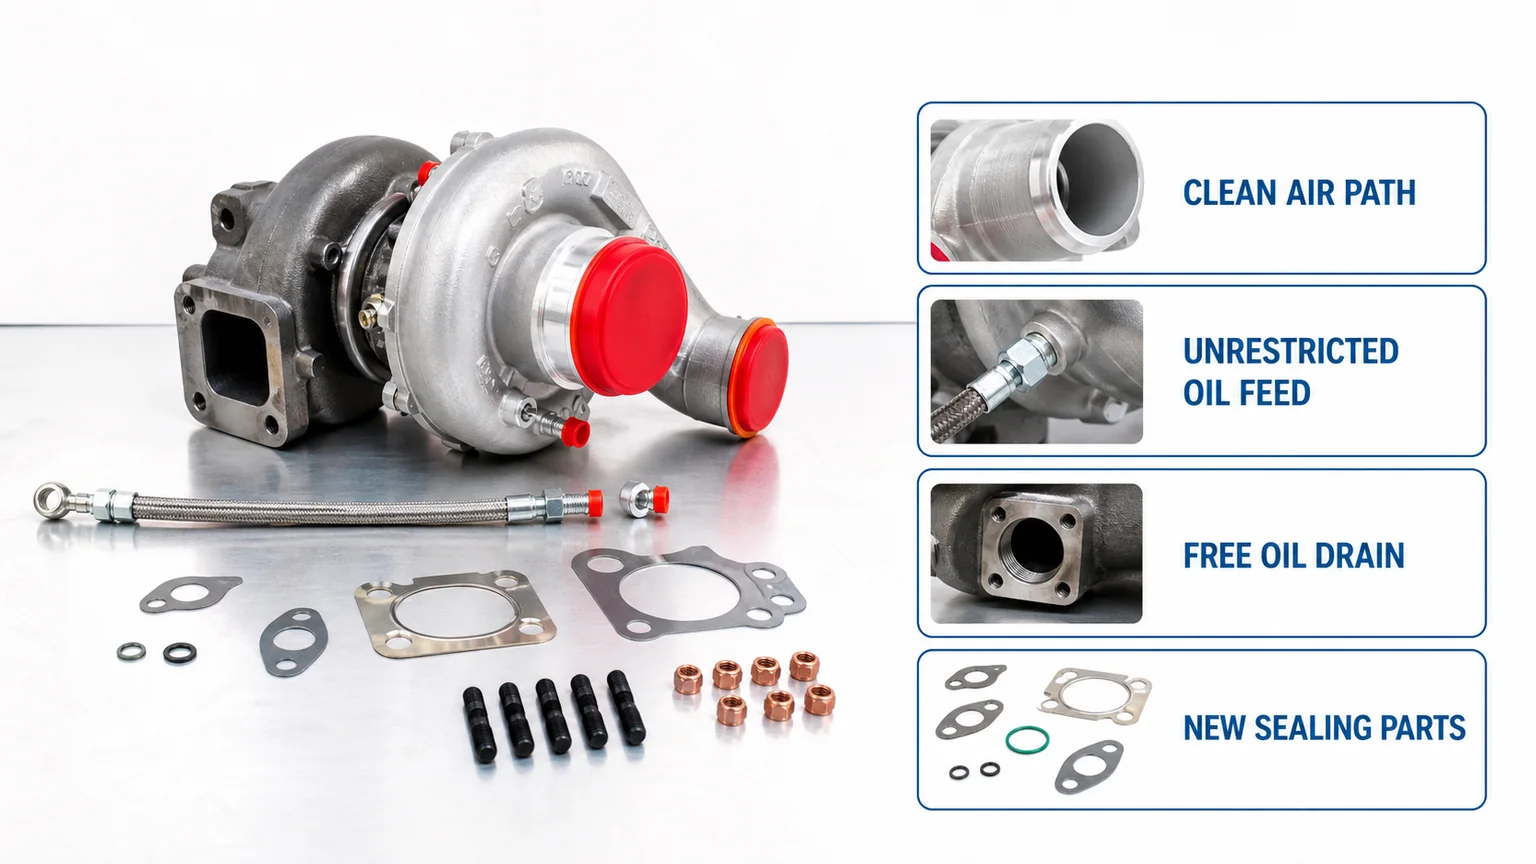
Compare the complete turbo number and suffix, engine and arrangement evidence, housing orientation, flange and port interfaces, oil and coolant connections where applicable, actuator identity, connector and supplied hardware. Confirm whether the order is a complete turbo, a center housing rotating assembly or another repair scope. A similar housing or an abbreviated OE number is not sufficient.
Keep inlet, outlet and oil-port protection in place until the corresponding connection is ready. Handle the assembly by suitable housings, not by an actuator, rod, hose or connector. Garrett warns against changing turbo or VNT calibration and against manually forcing self-blocking electronic actuator mechanisms. Preserve the as-supplied calibration unless the engine-specific procedure directs a supported operation.
Clean mating surfaces without allowing debris into the manifold, pipes or center housing. Use the correct new gaskets or seals and align oil openings. Liquid sealant or excess material near an oil port can obstruct flow. Inspect air hoses, charge-air connections, filters and housings for debris, collapse or damage; inspect exhaust connections for integrity. Replace or clean components only as the applicable instructions permit.
Record when each protection plug was removed and when the connection was closed. This simple custody record is more useful than a later statement that the work area “looked clean.” If the previous turbo shed wheel material, the related air path needs a defined disposition before release.
The feed must deliver clean oil by the specified route; the drain must allow oil to leave the center housing without restriction. A feed line can look sound outside while being restricted or heat-damaged internally. A drain can be kinked, coked, misrouted or exposed to pressure that impedes gravity return. Excessive crankcase pressure can also oppose drainage and produce apparent turbo oil leakage.
Use the engine or turbo instructions to decide whether lines are cleaned, tested or replaced. Document feed source, line condition, fittings, gasket alignment, drain orientation and destination, and the crankcase or breather checks required for the application. Do not add an unapproved restrictor or copy an oil-pressure target from a different bearing system.
Oil-path record | Release evidence | Unresolved risk |
|---|---|---|
Supply | Correct source, clean line, unobstructed fittings | Unknown internal restriction or delayed delivery |
Center housing | Specified fresh oil and pre-lubrication step | Dry first rotation or contaminated fill |
Return | Unrestricted downhill route where specified | Backpressure, kink, coking or crankcase-pressure effect |
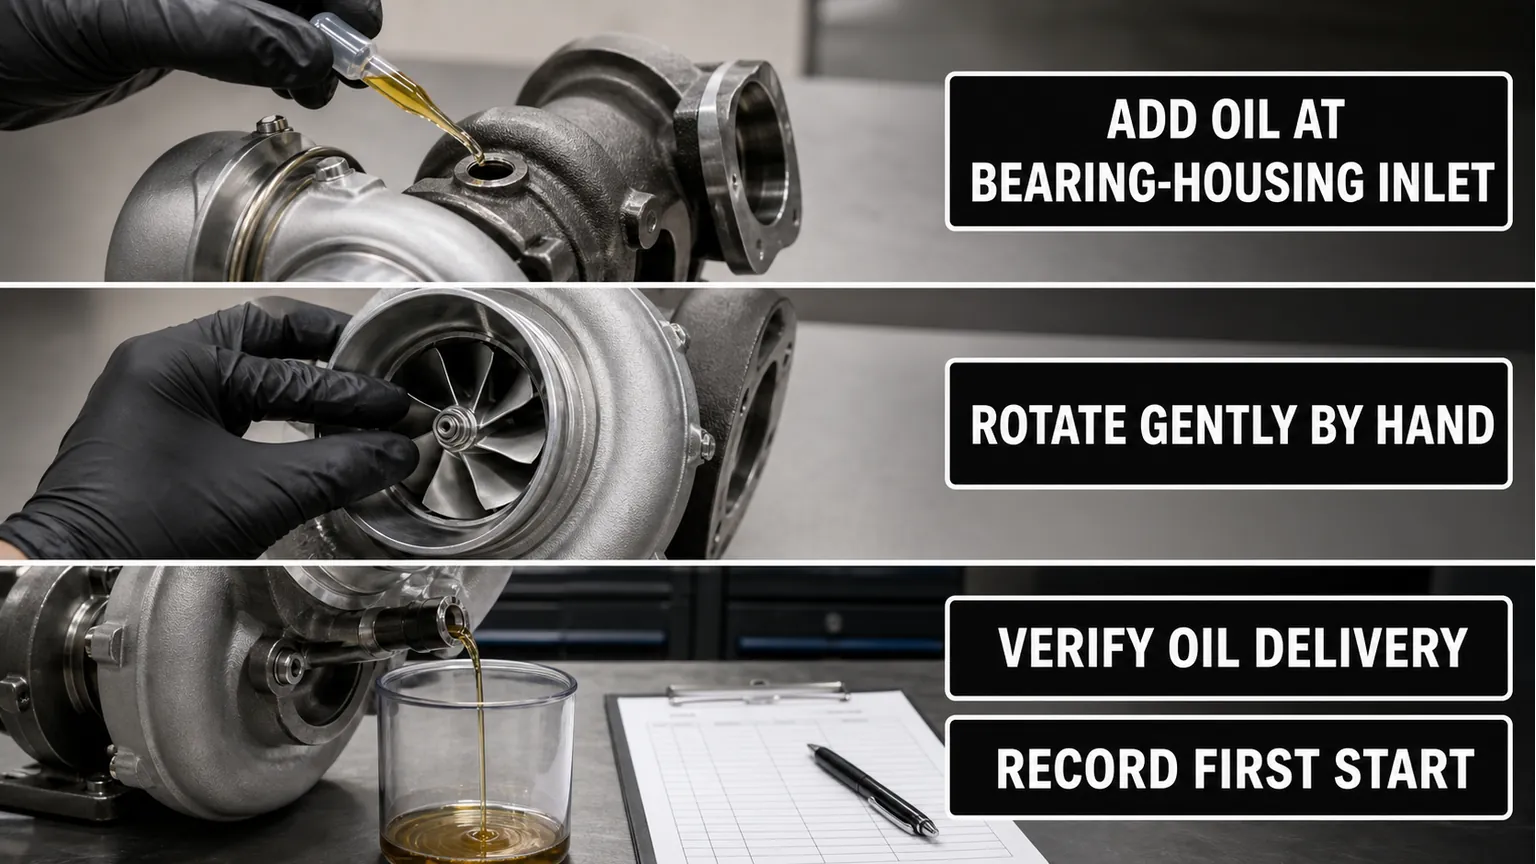
Garrett's installation guide directs fresh engine oil into the turbo oil inlet and describes rotating the compressor wheel by hand before completing the feed connection; Cummins and Navistar materials also document pre-lubrication for their stated applications. Use the method, oil and handling instruction that belongs to the installed unit. Do not spin the rotor with compressed air, power an unknown actuator or contaminate an open oil port.
Where the engine procedure calls for cranking without starting to establish oil supply, create the no-start condition exactly as specified and observe all starter-duty and vehicle-safety limits. A generic cranking time from a different guide is not an acceptance value. Record how oil delivery was established and who verified it.
Before starting, conduct a tool and foreign-object check, verify oil level, reconnect the specified control and intake paths, and confirm that people and equipment are clear. Start and idle only as the applicable instructions state. Watch for oil, coolant, air and exhaust leakage; abnormal contact or noise; warning conditions; and the required actuator behavior. Stop immediately if the procedure's hold condition is not met.
After the initial inspection, stop and recheck oil level and all accessible joints as directed. Retain the first-start time, operating condition, observations and corrective actions. A dry exterior at idle does not prove performance under every load, and a first-start leak is an installation hold—not evidence that the replacement turbo is inherently defective.
This guide does not authorize installing an unverified turbo, reusing damaged oil lines, altering a VNT stop or actuator calibration, starting an engine with unresolved foreign-object or lubrication damage, or using compressed air to spin the rotor. It also does not provide an oil grade, pressure, torque or idle duration for an unidentified application.
If severe engine damage, uncontrolled oil ingestion, wheel contact or unsafe leakage is present, follow the applicable shutdown and root-cause procedure before any further run.
Keep the purchase reference, complete turbo identity, engine and arrangement, included actuator and hardware, removed-unit evidence, corrected root cause, installation record, oil-path disposition, pre-lubrication method and first-start findings together. This packet helps separate a supply mismatch, installation issue, vehicle-system cause and product concern.
The turbocharger oil-feed inspection guide provides a deeper feed-line boundary. If matching is still required, send Elecdura the complete turbo and engine identity for quotation.
No. It supports the initial center-housing condition, but the engine must still deliver clean oil through an acceptable feed path and return it without restriction. Record both line dispositions, the applicable pre-lube procedure and the first oil-delivery evidence. A prefilled housing cannot overcome a blocked feed after the engine starts.
Only if the application procedure permits reuse and the line meets its specified inspection. Flowing solvent does not necessarily reveal an internally collapsed flexible liner, heat damage, embedded debris or a restriction under hot oil conditions. If the turbo or engine maker requires replacement, a visual or shop-air check cannot override that instruction.
Not by itself. Oil leakage can be influenced by drain restriction, crankcase pressure, air-path restriction, installation angle and operating conditions. Preserve the location and amount, then follow the turbo and engine leakage diagnosis. Do not replace the new unit until the oil supply, return and related-system boundaries are examined.
Use the exact engine and actuator procedure. Confirm identity, connector seating, power, ground, communication and supported service functions before condemning the actuator or turbo. Do not force the linkage by hand; some actuator gears are self-blocking and can be damaged by manual movement.
Include both unit identities, engine and arrangement, complaint chronology, root-cause findings, oil and air-path actions, installation and priming record, first-start observations, codes, photographs and requested return handling. Keep the assembly intact unless the supplier authorizes disassembly. The record supports investigation but does not predetermine warranty coverage.