Your Whole New Supply Chain For Heavy-Duty Parts
Whatsapp:
+86 18915027366
Phone:
+86 18915027366
Views: 0 Author: Site Editor Publish Time: 2026-07-28 Origin: Site
Turbocharger shaft play is often treated as a quick pass-or-fail check, yet an unloaded journal-bearing turbo can move differently from a ball-bearing unit, and dry bench movement does not reproduce the centered oil film created at speed. A technician who condemns every perceptible movement wastes usable assemblies. A technician who ignores wheel contact, axial motion, oil contamination, or damaged thrust surfaces risks a compressor or turbine failure under load.
For heavy-duty fleets, rebuilders, and importers, the useful question is not whether the shaft moves; it is whether the measured movement, contact evidence, lubrication history, and operating symptoms agree. Buyers reviewing the Elecdurauto heavy-duty turbocharger range should combine OE-reference matching with engine, turbine housing, actuator, oil-line, and duty-cycle evidence before approving a replacement.
This guide explains a controlled inspection sequence for radial and axial movement, wheel-to-housing contact, oil leakage, bearing condition, actuator faults, and replacement acceptance. It also shows how to document measurements for B2B sourcing so a visual concern becomes a defensible technical decision rather than a guess.
A disciplined record also protects inventory decisions: it shows whether a returned core failed from wear, installation conditions, contamination, control faults, or an application mismatch before another batch is ordered.
Begin with the engine stopped, cooled, isolated, and protected from an unintended start. Remove intake ducting without dropping dirt, hardware, rag fibers, or sealant into the compressor inlet. Photograph hose position, clamp alignment, oil residue, compressor nut, blade condition, and housing orientation before cleaning anything. These initial observations can explain a fault that disappears once the parts are wiped.
Keep the assembly mounted when possible for the first check. A loose turbo on a bench can shift in the fixture and make indicator readings meaningless. If removal is required, support the center housing and avoid using the compressor or turbine housing as a lever. Cap oil and coolant ports immediately; contamination introduced during inspection can damage a replacement as quickly as the original unit.
Record turbo reference, engine model, rated output, serial details, actuator type, oil supply arrangement, and operating hours. The same visual frame can be used across several applications while bearing clearances, thrust design, and acceptable limits differ. Fleet records should therefore link every observation to the exact assembly and service information.
A complete heavy-duty turbocharger should be identified and stabilized before radial or axial movement is measured.
Cool, isolate, and secure the machine before opening the air path
Photograph inlet residue, blades, nut, housing, and clamps before cleaning
Support the center housing without loading either wheel
Record engine, turbo reference, actuator, hours, and duty cycle
Do not rotate or measure the shaft until loose debris is removed from the work area and open ports are protected. A clean inspection is part of the repair, not an optional housekeeping step.
Many heavy-duty journal-bearing turbochargers run on a hydrodynamic oil film. With the engine stopped and oil pressure absent, the shaft and floating bearings are not centered exactly as they are during operation. Light radial movement can therefore be perceptible without proving that the unit is worn beyond limit. Ball-bearing designs, fixed-bearing arrangements, and some compact units behave differently, so one universal finger test is unreliable.
The diagnostic distinction is between controlled clearance and evidence of contact or instability. Move the shaft gently at the nut or wheel hub without pressing on fragile blade tips. Rotate the wheel through a full revolution while applying light radial force in several directions. A smooth assembly that never allows blade contact presents different evidence from one with scraping, tight spots, or an eccentric track in the housing.
Do not use excessive hand force to demonstrate movement. A lever, screwdriver, or aggressive pull can damage the thrust system or distort a valid reading. If the manufacturer publishes a dial-indicator procedure, fixture the indicator at the specified point and direction. State whether the value is total indicator movement or one-sided displacement; confusing those conventions can double the reported clearance.
Bearing design and whether the assembly is dry or oil-primed
Indicator position, direction, and measurement convention
Smooth rotation under light movement in multiple directions
Any blade contact, witness mark, scraping, or tight sector
Perceptible radial motion alone is not a replacement decision. Require the applicable limit or combine the movement with contact, noise, oil, performance, or bearing evidence.
Axial movement loads the thrust bearing and should be evaluated independently from radial clearance. Position a dial indicator so its tip follows the shaft axis, preload the indicator, zero it, and move the shaft gently from one end position to the other. Repeat the cycle to confirm that the fixture is stable and the result is repeatable.
Excessive end play can allow compressor or turbine wheels to shift relative to their housings, disturb sealing behavior, and indicate thrust wear caused by oil starvation, contamination, compressor surge, overspeed, or high exhaust backpressure. Very little movement with binding is also concerning because coking, distorted components, or contact may prevent free rotation. The measurement only becomes useful when paired with the operating history.
Record the unit, ambient condition, measurement point, indicator resolution, repeated readings, and published limit source. If no verified limit is available, do not invent a generic threshold from another turbo family. A specialist inspection or approved replacement can be justified by physical damage and symptoms, but the report should state that the numerical limit was unavailable.
Indicator alignment parallel to the shaft centerline
Preload, zero position, and repeated end-to-end readings
Published limit source for the exact turbo family
Surge, overspeed, oil, and backpressure history
Treat axial play outside an exact verified limit, or axial movement accompanied by contact and thrust damage, as a stop-use condition pending repair or replacement.
Wheel-to-housing contact is more decisive than a vague description of looseness. Inspect the compressor shroud for bright arcs, polished bands, gouges, aluminum transfer, or blade-tip rounding. Use suitable access and lighting on the turbine side to look for matching marks, damaged tips, carbon interference, and heat discoloration. Compare the pattern around the full circumference rather than judging one visible sector.
A contact track may result from worn bearings, a bent shaft, foreign-object impact, housing misalignment, loose fasteners, thermal distortion, or a failed thrust system. If only one blade is damaged, ingestion becomes more likely. If several blade tips show an even circular polish, shaft control or housing relationship deserves closer review. Neither pattern should be hidden by cleaning before photographs are taken.
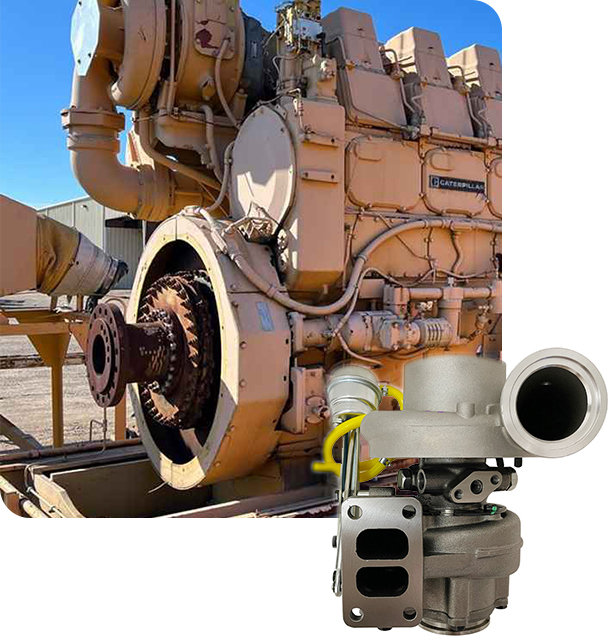
A replacement such as the 6N7203 Caterpillar D8K turbocharger must be protected from the cause of contact. Inspect the intake path, air-filter housing, duct fasteners, exhaust manifold, oil feed and drain, crankcase ventilation, and mounting surfaces. Installing a new assembly without this upstream and downstream review can create an immediate repeat failure.
Housing condition, wheel clearance, and application identity must be evaluated together rather than by shaft feel alone.
Compressor shroud arcs, blade-tip polish, nicks, and debris
Turbine housing marks, carbon rub, heat damage, and tip loss
Shaft rotation through a complete revolution under light load
Intake, exhaust, mounting, oil, and crankcase contributors
Any confirmed wheel contact or cracked, bent, or missing blade material blocks reuse. Contain the intake and exhaust systems until all fragments and root causes are accounted for.
A light oil film in the compressor inlet does not automatically prove a failed turbo seal. Closed crankcase ventilation, long idle periods, restricted air filters, compressor inlet depression, oil overfill, and charge-air condensation can place residue in the ducting. On the turbine side, engine oil consumption, guide or ring wear, and exhaust restriction can produce smoke that is incorrectly blamed on the center housing.
Map the oil path. Check supply pressure and restriction, drain slope and blockage, drain flange sealing, crankcase pressure, oil grade, service interval, contamination, and hot-shutdown practice. A restricted drain or high crankcase pressure can force oil across a serviceable sealing arrangement. Conversely, bearing and thrust wear may allow shaft motion that disrupts oil control even when lines appear clean.
For B2B warranty review, preserve oil samples, line photographs, drain orientation, crankcase-pressure readings, smoke condition, boost behavior, and the time at which residue appears. This separates installation and engine-system causes from a defective assembly. It also tells a supplier whether replacement should include oil lines, gaskets, or procedural changes.
Feed pressure, line restriction, banjo screens, and contamination
Drain diameter, slope, kinks, coking, and flange condition
Crankcase pressure, breather restriction, oil level, and grade
Compressor-side versus turbine-side residue and smoke timing
Do not condemn the turbo from oil residue alone. Confirm the direction and cause of oil movement, then correct feed, drain, ventilation, or engine faults before commissioning another unit.
Mechanical inspection should agree with vehicle behavior. Review requested and actual boost, exhaust temperature, intake restriction, charge-air leakage, exhaust restriction, actuator command, vane position where applicable, smoke, fuel correction, and engine load. Low boost can come from leaks or control faults even when shaft clearance is acceptable. Overspeed caused by a leak can later damage a previously sound turbo.
Listen for siren noise, cyclic surge, scraping, and changes during load transitions. A stable whistle without contact evidence is different from a rapidly rising tone accompanied by oil consumption or lost performance. On variable-geometry units, sticking vanes or an actuator calibration fault may mimic a damaged center section. Separate air-path, control, and rotating-group evidence before ordering.
Use comparable operating points rather than mixing idle, no-load acceleration, and rated-load data. A generator set, agricultural tractor, mine vehicle, and highway truck expose the turbocharger to different load steps, dust, heat, and shutdown behavior. The acceptance criteria must reflect the application that produced the complaint.
Commanded versus actual boost at repeatable load
Charge-air leaks, intake restriction, and exhaust backpressure
Actuator command, vane travel, calibration, and fault codes
Noise, smoke, oil use, temperature, and duty-cycle timing
Replace the turbo only when rotating evidence or confirmed physical damage explains the operating complaint. If air-path or actuator faults dominate, repair and retest before changing the assembly.
A serviceable assembly with movement inside the verified limit, no contact, controlled oil, and normal performance may remain in use after upstream issues are corrected. A unit with actuator or external control faults may need a verified component service rather than a rotating assembly. A damaged shaft, wheels, housings, thrust system, or contaminated center section usually requires qualified rebuilding or complete replacement.
Core repair is not simply replacing bearings. The rebuilder must inspect and measure shaft journals, thrust parts, seal areas, wheels, housings, threads, and fasteners; check cracks and distortion; balance the rotating group using an appropriate process; set actuator or vane calibration; and document the final test. Unknown mixed components create a traceability problem for distributors and fleets.
Where complete assembly replacement is chosen, a reference such as the TBP4 Cummins 6BTAA turbocharger still needs engine, housing, flange, oil/coolant port, compressor outlet, actuator, and calibration confirmation. An OE number is a starting key, not proof that every configuration detail matches the removed unit.
undefined
Verified clearance and contact evidence
Wheel, shaft, bearing, thrust, housing, and actuator condition
Balancing, calibration, and traceability capability
Downtime, core logistics, warranty evidence, and batch consistency
Choose the narrowest repair that restores verified function without hiding damaged rotating parts. If balancing, calibration, or traceability cannot be proven, use a complete matched assembly.
A strong inquiry includes engine make and model, equipment, rated power, serial information, turbo reference, all visible casting or tag numbers, photos from both ends, oil and coolant configuration, actuator connector, turbine and compressor housing orientation, and quantity. Add the measured radial and axial findings, contact evidence, boost data, smoke, oil use, and root-cause work already completed.
Separate verified facts from assumptions. State whether the request is for an OE-reference aftermarket replacement, a remanufactured unit, a cartridge, an actuator, or inspection support. Do not describe a product as genuine merely because the reference originated with a major turbo brand. For importers, specify packaging, labels, sample approval, test records, core policy, lead time, and repeat-order requirements.
Elecdurauto can review a heavy-duty turbocharger sourcing request when buyers provide enough application and failure evidence. The review should confirm fitment boundaries and commercial scope before a sample is installed. This avoids treating a photograph or a single stamped number as the complete specification.
Engine, equipment, power, serial, and turbo references
Housing, flange, port, outlet, actuator, and orientation photographs
Measured play, contact, boost, smoke, oil, and root-cause findings
Quantity, packaging, test, warranty, sample, and repeat-order needs
Do not release a bulk purchase until the supplier confirms the exact physical, control, and application details and the sample passes installation and loaded validation.
Before installation, clean or replace contaminated intake and charge-air components, remove debris from exhaust paths, correct oil-feed and drain faults, verify crankcase ventilation, and inspect the manifold and fasteners. Prime the turbocharger with the specified clean oil and follow the manufacturer’s cranking or oil-pressure procedure. Dry startup can damage a new bearing system in seconds.
Confirm housing orientation and actuator setting without twisting the center housing beyond approved procedures. Use new gaskets and correct fastener torque. Do not apply sealant where it can enter oil passages. Start the engine, verify oil pressure and leaks, allow controlled warm-up, and monitor boost, smoke, sound, and temperatures before moving to full load.
The commissioning file should repeat the relevant measurements after a representative duty cycle. Record boost response, actuator behavior, oil control, shutdown practice, and post-run wheel inspection where access permits. The Elecdurauto aftermarket supply profile can support product discovery, but fleet reliability depends on the entire installation and validation chain.
Clean air and exhaust paths and correct the original root cause
Verify oil feed, drain, ventilation, priming, and pressure
Confirm housing orientation, actuator setting, gaskets, and torque
Warm gradually, load progressively, and document post-run condition
Return the vehicle or machine to service only after the replacement reaches stable boost without leaks, smoke, abnormal noise, contact, actuator faults, or oil-control evidence.
Turbocharger shaft play is useful only when the inspection controls force, measurement direction, bearing design, contact evidence, oil condition, and operating context. Light dry radial movement may be normal for a journal-bearing assembly, while axial excess, blade contact, binding, thrust damage, or system symptoms can justify immediate containment.
For fleets and B2B buyers, the best replacement decision links dial readings to boost, air-path, actuator, lubrication, crankcase, and engine evidence. A complete RFQ and controlled commissioning process protect the new turbocharger from the same root cause and create a repeatable basis for sample approval, warranty review, and wholesale replenishment.